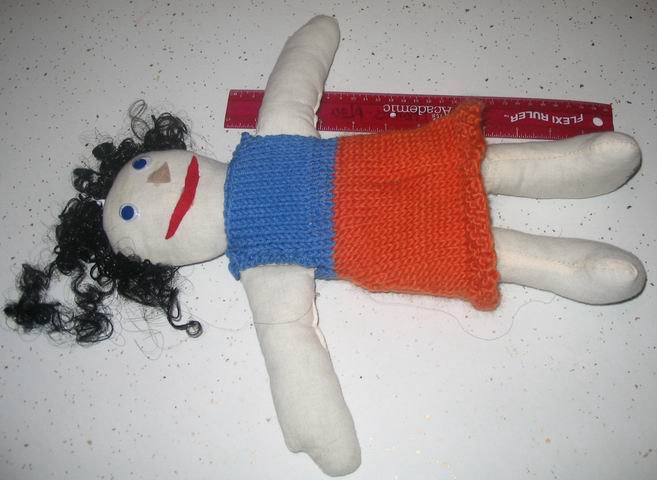
Baby Sister Milk is looking pretty sharp these days. She's wearing an orange and blue hand-knit tank dress, with an A-line shape, hemmed with seed stitch.
Here's how it was made:
Yarn - leftovers of 2 worsted weight yarns. I used Lion Brand Cotton Ease (Blue - bodice) and Lamb's Pride Worsted (Orange - skirt)
Needles: Size 8 DPN, or whatever seems reasonable for the yarn.
The dress is knit in the round from the bottom up, kitchnering the shoulders together.
Hem: Cast 60 stitches of the skirt yarn on 3 DPN, joining together. Either mark the beginning of the round or use the cast-on tail as a bookmark. Knit 4 rows seed stitch (K1P1 odd rows, P1K1 even rows).
Main Skirt: Decrease line will be at the middle of the round and at the end of the round, every other round.
Row 1: K28, K2tog, knit to last two stitches, k2tog. (58 sts)
row 2: knit
Row 3: K27, k2tog, knit to last two stitches, k2tog (56 sts)
...
Do the decrease row where you end with 40 stitches on the needle (at some point in the above procedure you will probably have to redistribute your stitches), then do the knit round after that. End of skirt.
Bodice: Switch to the bodice color.
Have the doll try on the dress to see how far up her armpits are and if you need to make the dress narrower still. It's also a good reality check to see if the skirt is fitting still.
If reductions in width are still needed, continue with skirt method until the required width is reached. For Baby Sister Milk, we did only one row with decreases, then regular stockinette stitch until we reached her armpits. For us, it was a total of 4 rounds, and we had 38 stitches on the needles.
Arms: Divide the stitches so that you're working on two DPN - one for the front, one for the back. The lines of decreases should run up the right and left sides of the dress. At the arms, the pattern is worked in back-and-forth to leave an opening for her arms. The pattern is now stockinette with a two columns of garter stitch on either edge.
row 1: k across
row 2: k2, p to last two, k2
Do this until the flap you've created reaches the doll's shoulders. Have the doll try on the dress. Check to see how wide the head hole needs to be. In our case a 4 stitch shoulder was what worked. When it's long enough, the ending row is:
k4 to keep, bind off the middle stitches, k4 to keep. Leave a long tail for kitchnering the second shoulder. We had a total of 13 rows for the arm section. I ran a yarn through the live stitches, one yarn for each shoulder, and tied in a bow to use as a stitch holder.
Repeat this section on the other needle. If you work it right, you'll end up with a tail on each shoulder. If that's not how it worked out, tink back the last row, reknit in pattern, then do the last row and you should be squared up with a nice tail on each shoulder. Kitchner each shoulder. Tuck in loose ends.
It's a dress that could use some embellishment - a ribbon bow, a line of buttons, maybe some sparkles or felted flowers.
No comments:
Post a Comment